Paramount Decisions simplify the decision-making process and help organizations make more transparent and collaborative group decisions. There are several ways to create a new decision.
You can create a new Decision from:
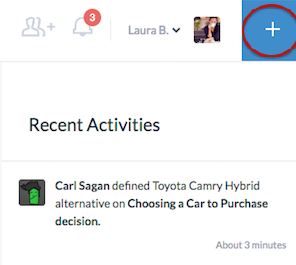
The easiest way to create a new decision is from the blue plus sign located on the top right corner of all pages.
To do so:
The decision-making process of Paramount Decisions contain of 8 steps, as specified in the upper menu inside the decision. You can navigate through the different steps by clicking on each of the tabs in the menu.
Notice that you need to complete each step before moving to the next one, but you can always go back and edit previous steps.

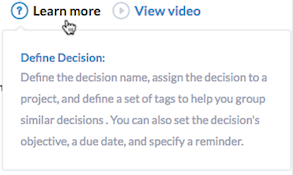 Each step contains a guide with instructions on what to do. You can either click on Learn more or Watch Video if you need any help. We recommend that you do it the first time you create
a new decision.
Each step contains a guide with instructions on what to do. You can either click on Learn more or Watch Video if you need any help. We recommend that you do it the first time you create
a new decision.
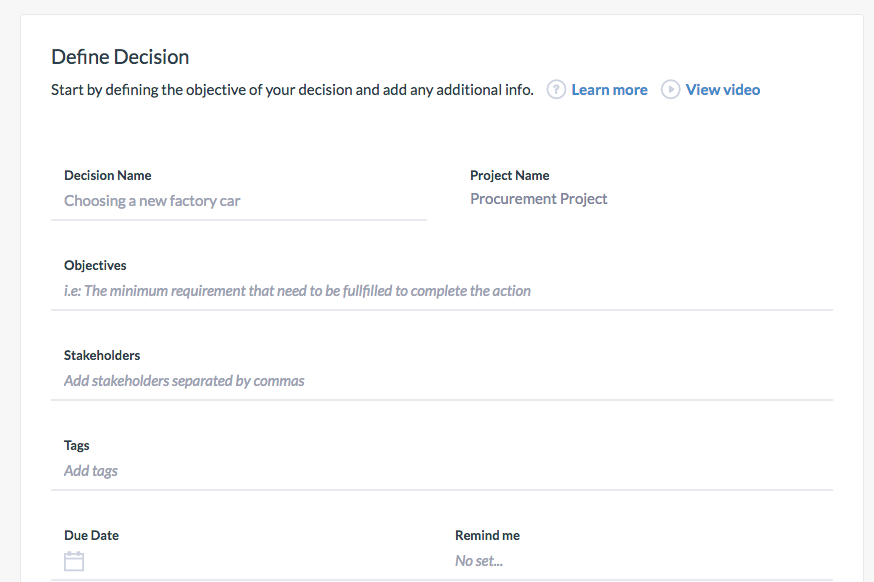
The first step is to define your decision and add additional info including:
Notice that you can also fill out some of this info when you first create the decision. The Decision Name and Project are the only required fields, the rest is optional. We recommended that you and your collaborators fill out the information in step 1 before continuing to the remaining steps.
Click Continue to proceed to step number 2.
The second step of the decision-making process is to define the alternatives you are choosing between. An alternative could be two or more people, things, or plans from which one is to be chosen. To learn more, watch the tutorial inside this step, or visit our Resource or Help Center.
To add a new alternative:
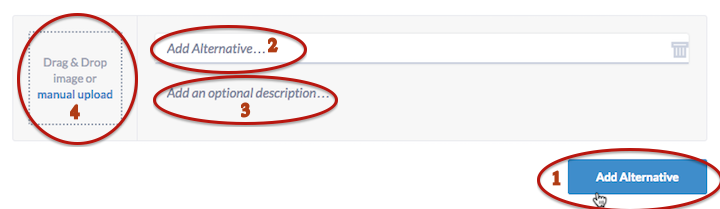
To Delete an alternative, click on the trash bin next to the alternative.

To add a Comment to an alternative,
 next to the alternative
 it if it need additional attention.
If you have a general comment regarding the decision or this particular step, or if you want to view all previous comments, simply click on the Comment box in the lower right corner

After you have added your alternatives, proceed to step number 3 to define factors & criteria.
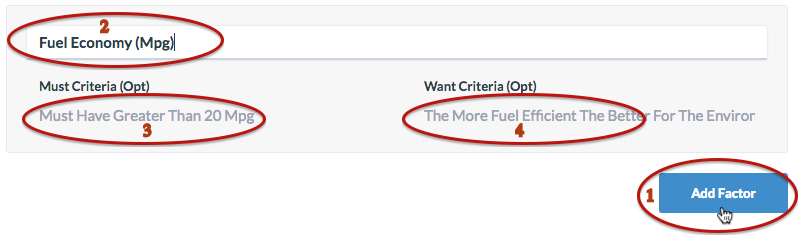
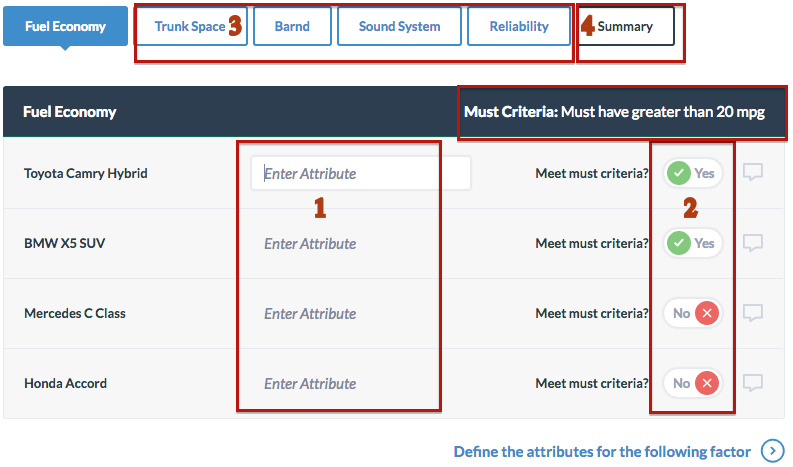
The third step in the decision-making process is to define the factors and criteria. A factor is an element, part, or component of a decision. To learn more, watch the tutorial inside this step, or visit our Resource or Help Center.
To add a new Factor & Criteria:
Notice that cost is not considered as a factor and due its importance in the decision-making process; it needs to be defined and evaluated separately in step 7.
Remember that adding a want or must criterion is optional and it is not mandatory to have both. You should have at least a want or a must criterion for each factor.
To Delete a factor, click on the trash bin next to the factor.
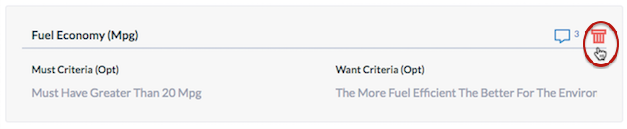
To add a comment or flag a comment, click on the Comment icon
next to the factor.
Please processed to step number 4 in order summarize the attributes after completing this step.
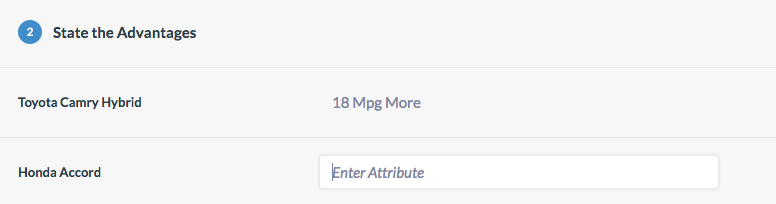
The fourth step in the decision-making process is to summarize the attributes of each alternative. An attribute is a characteristic, quality, or consequence of just one alternative. To learn more, watch the tutorial inside this step, or visit our Resource or Help Center.
To summarize the attributes:
Click on the Comment icon
next to the alternative to add a comment.
Please proceed to step number 5 in order to decide the advantages after completing this step.
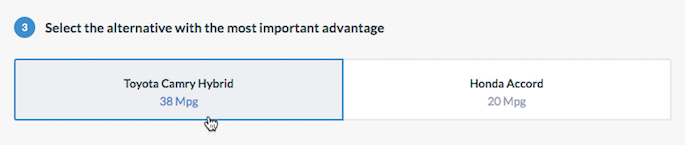
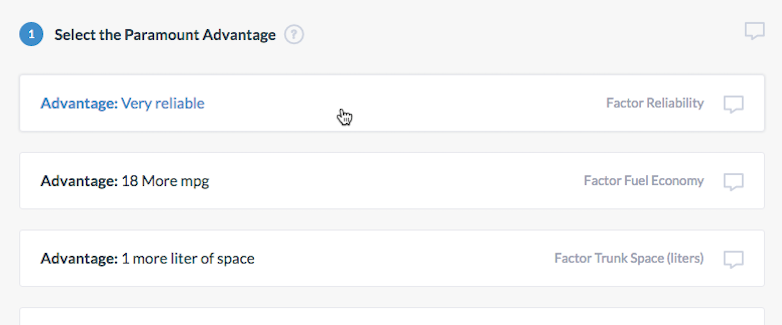
The fifth step in the decision-making process is to decide the advantages of each alternative. An advantage is a benefit, gain, improvement, or betterment. Specifically, an advantage is a difference between the attributes of two alternatives.To learn more, watch the tutorial inside this step, or visit our Resource or Help Center.
To complete this step:


Click on the Comment box
to add a comment.
Remember: You need to complete each part ( ,
, ,
, ) in order to be able to work on the following part.
Please proceed to step number 6 to Decide the Importance of advantages after completing this step.
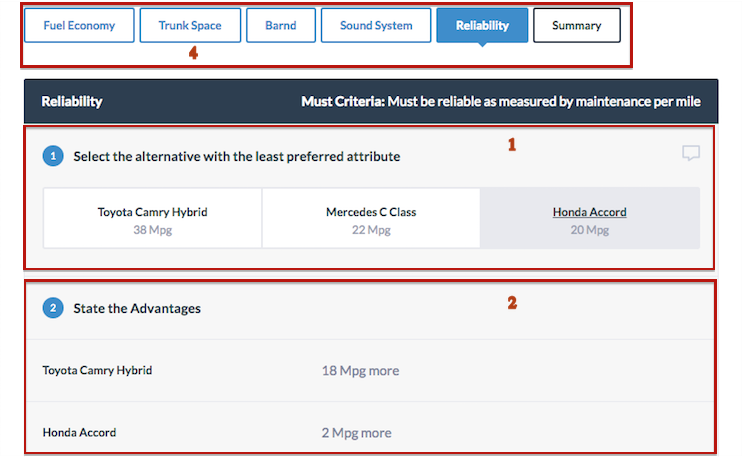
The sixth step in the decision-making process is to decide the Importance of Advantages. In this step, you will encounter the more subjective aspect of the decision-making, and it could be a good idea to invite the different stakeholders to collaborate with you. To learn more, watch the tutorial inside this step, or visit our Resource or Help Center.
To complete this step:
Notice
If the most important advantage in two different factors are exactly the same, you will get a message asking you whether they should be given the same score. Please confirm if that is the case.
If an advantages does not have an importance and you do not want to assign a score for the advantage ( leave it at 0), you can still move to the next part by clicking on Continue.
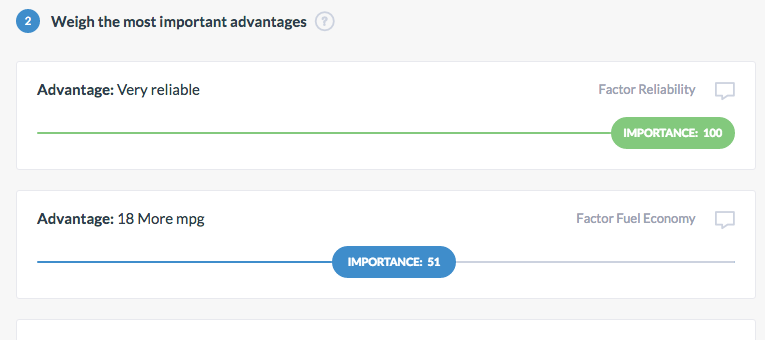
Notice that the weight of the remaining advantages in each factor cannot be greater than the weight of the most important advantage in this factor.

Click on the Comment box
to add a comment. Please proceed to step number 7 to define the cost of each alternative after completing this step.
The seventh step in the decision-making process is to define the cost of each alternative. The cost is the price that must be paid in order to obtain an alternative and can be broken into several categories. Notice that the cost is treated separately with a clear distinction from the remaining steps. To learn more, watch the tutorial inside this step, or visit our Resource or Help Center.
To define the cost:
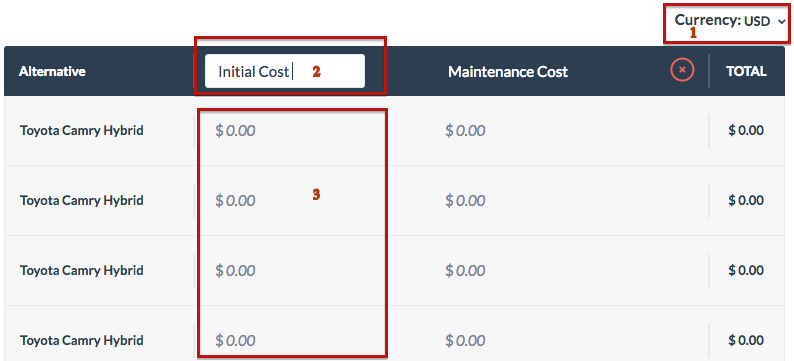
To Add a cost category:

To Delete a cost category:

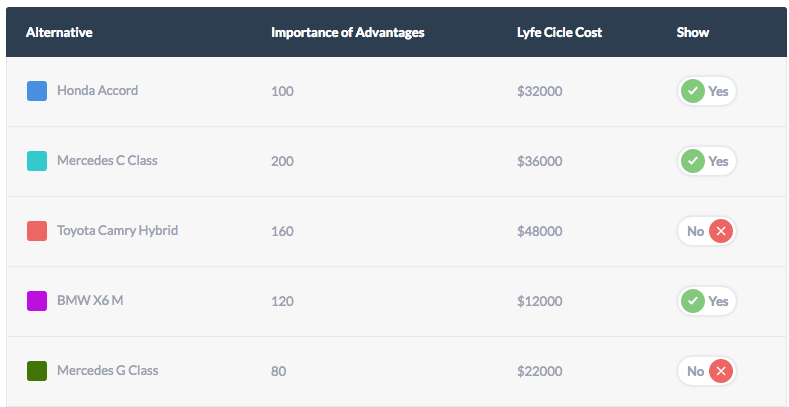
The eighth and last step in the decision-making process is to make a decision. A decision is based on the combination of the importance of advantages and the cost. Alternatives with higher cost but lower importance of advantages are "inferior" alternatives and should not be considered. To learn more, watch the tutorial inside this step, or visit our Resource or Help Center.
All alternatives are shown on the graph, with Cost along the x-axis, and Total Important of Advantages along the y-axis. Hover over alternatives in the chart to view more info.
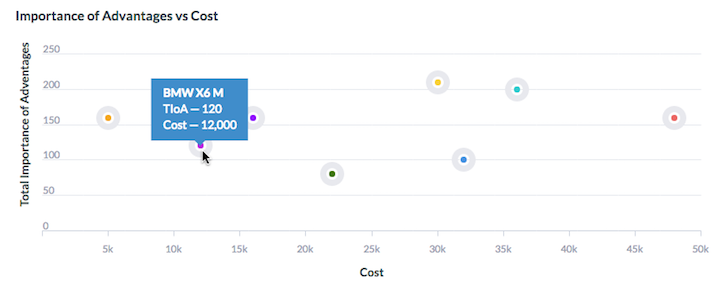
You can Filter the alternatives inside the chart by scrolling the cost and importance of advantages filter.

A Summary of the chart content is shown in the table below the chart. Each alternative is given a unique color to make it easier to find inside the chart. You can also Hide alternatives from the chart, by scrolling to ‘No’ next to the alternative inside the table.
To make a decision:
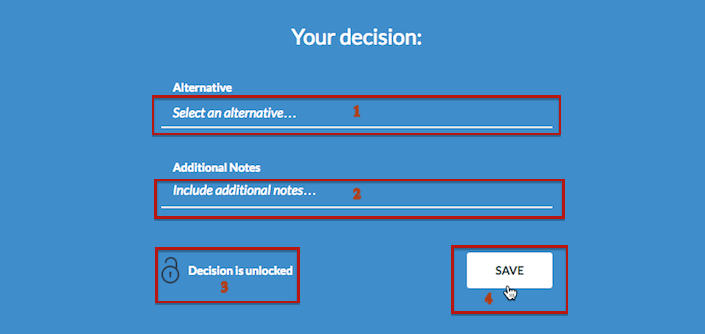
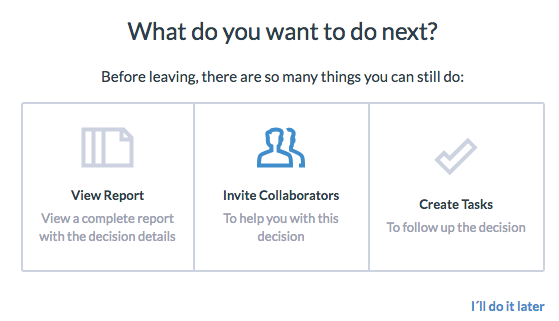
Once you Save the decision, a new window will appear asking you what you want to do next. You can View Report, Invite Collaborator or Assign Tasks. Learn more about this in the next chapter.